Wahoo Kickr Review: Everything you need to know
If you want to keep your bike fitness up over the winter, but struggle for motivation to go out in the cold, a turbo trainer is a great idea. They are also good for those who are pushed for time or recovering from an injury. This is because you can simulate your ride without leaving the house. They keep you off the roads when it is dark, which is a much safer way of Exercising. in this Wahoo Kickr review, I am going to tell you why it is one of the best turbo trainers you can buy.
Pros
- Quiet
- Smooth
- Well made
Cons
- Need a separate cadence sensor
Verdict
A fantastic indoor bike trainer. It is quiet and smooth, while having a realistic feel.
What is the Wahoo Kickr Bike Trainer?
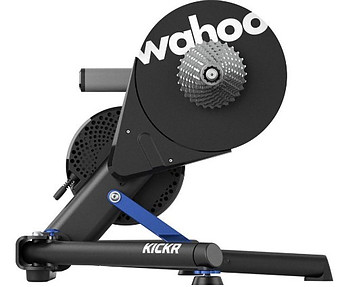
The Wahoo Kickr bike trainer is one of the best direct drive smart turbo trainers available.
You can easily control the resistance, it is very realistic, stable and you can connect it to a range of apps. You will notice at around £999, that it is quite expensive, but if you are serious about bike fitness, you probably can’t do better than the Wahoo Kickr bike trainer.
Be Smart
The Wahoo Kickr bike trainer is hugely popular in the direct drive smart trainer market, and its popularity is growing. The range of apps take the monotony out of indoor bike training, making it way more appealing.
Connectivity via Bluetooth or ANT+ to your phone, tablet, bike computer or computer is quick and easy. The easiest way to control the Wahoo Kickr bike trainer is via the Wahoo app. This allows you to set the resistance and to pedal in whatever gear you like. If you change gears or cadence, the app will automatically adjust to suit.
The best way to control the Wahoo Kickr bike trainer is to use a programme. Software such as Zwift, changes the resistance in real time when you are following a specific workout or a virtual reality course.
There are lots of different courses from all over the world to choose from. You can even connect it to Strava, to get virtual KOMs. You even get a 60-day trial of Strava premium membership.
When you buy the Wahoo Kickr bike trainer, you also get free trials for Sufferfest, Kinomap Rouvy and TrainerRoad apps. This is a nice touch, as you can try each one to see which one you prefer. However, if you just want to control your trainer, the free Wahoo fitness app is perfectly good.
Setting up the Wahoo Kickr Trainer
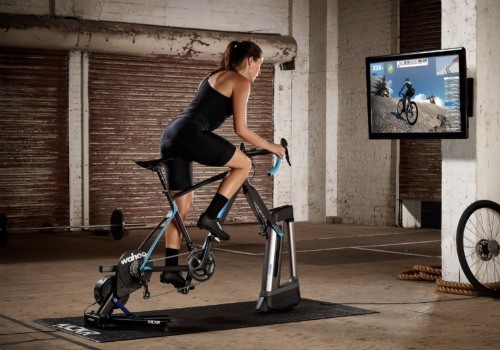
It is super easy to set up the Wahoo Kickr bike trainer. It comes with an 11 speed cassette already fitted. You just need to remove the quick release axle, pull out the end caps, replace them with the through axle end caps and use the bike’s axle to fit it to the trainer. It does need to be plugged in, so you will need to take that in to account when you are looking for somewhere to put it. You don’t need to worry too much about using it on uneven surfces either, as the feet are adjustable.
It is not a light piece of equipment, as it weighs 21kg. This means you might not want to move it around too much, but this weight means that it is super stable. Stability is very important, especially when you are doing fast interval training or on a sprint finish. However, it doesn’t take up too much space, as the feet fold away. So, you should be able to stash it somewhere relatively easily.
Riding the Wahoo Kickr Trainer
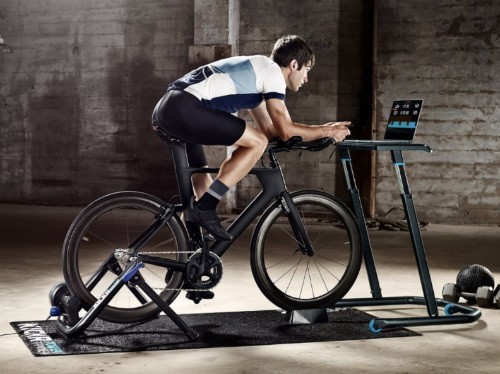
It is a reasonably quiet trainer, but not the quietest one you will find. However, you can easily hold a conversation above the noise and it shouldn’t disturb anyone in an connecting room too much. So, if you have a fan and some music (essential indoor training set up), the noise it makes isn’t an issue.
The pedaling on the Wahoo Kickr trainer is super smooth and it is very responsive to the change in resistance levels. This is very important when interval training. It also makes it using Zwift more realistic.
One of the best things about the Wahoo Kickr bike trainer is the fact that it has an integrated power meter. This is great for those of you who are pushed for time, as you don’t need to waste time making sure each session is productive. To do this, you need to know your power zones, by determining your functional threshold power. Don’t worry if this sounds complicated, the trainer calculates all this for you after a 20-minute blast session. The benefit of this, is that you can use the Wahoo app to change the resistance by just telling it what power you want to pedal at.
Features:
- Hub Compatibility: 130/135 QR and 12×142, 12×148 Thru-Axle, (adapters and spacers included)
- Rear Wheel Size: Road: 24”, 650c, 700c; MTB: 24”, 26”, 650b, 29”
- Third-Party App Compatible: Yes: Zwift, Fulgaz, Rouvy and KinoMap
- Max Power: Bluetooth, Ant+, FE-C
- Mobile Compatibility: Apple, Android, Windows
- Accessory Compatibility: KICKR Climb, KICKR Desk, KICKR Headwind, KICKR Mat, TICKR Heart Rate Monitors (all sold separately)
Is it worth the money?
There are a lot of turbo trainers coming on to the market at the moment, priced higher and lower than the Wahoo Kickr bike trainer. However, it is still one of the best you can buy. It is solid, stable and quiet enough to not upset anyone. The connectivity with apps makes it one of the more easy and entertaining turbo trainers too. Which for me, is the most important thing, as motivation can be somewhat lacking, and anything that will help that, has to be good.
It is a large amount of money, but if you are honest with yourself on how much you are going to use it, it is a worthwhile investment.
Are you Tempted?
Are you going to buy one? If so, let me know in the comments section below. Also, don’t forget to sign up for the MTB-Threads newsletter!
Tips For Using an Indoor Bike Trainer
Even though we love riding our bikes, sometimes it is preferable to stay in doors when the weather is bad. However, it is better for you to be doing something active rather than getting fat on the sofa. This is where an indoor bike trainer comes in handy. The problem is that it can be quite boring if you don’t get your set up right. So, I am going to giver you some tips for riding indoors on a trainer such as the Wahoo Kickr.
Have a dedicated space
You are more likely to jump on your bike trainer if it is convenient. So, ideally you should put it where you can leave as much of the necessary stuff out as possible. If you have to dig it all out every time, the chances are you are not going to bother.
Shopping list
There are a few essentials you are going to need to make your indoor training more interesting.
- Indoor bike trainer
- Front wheel block
- A fan or two
- Entertainment (TV, radio, music, etc)
- Something to put the TV remote on, so you can reach it
- Towels (one for mopping yourself up and one for catching the sweat
- Bike
- Water bottles
Set up your space
Having the bare essentials of a bike on the trainer and some towels is fine, but seriously boring. Where you put your indoor bike trainer, you need to be able to have a TV in front of you for entertainment and a fan to keep you cool. it is easy to feel cramped and claustrophobic in small spaces with your trainer. Therefore, you may need to put your back wheel as close to the wall as possible, to create space in front of you.
Entertainment
Ideally, you should place a TV six feet in front of your bike. You may have to take it of its stand to put it in the perfect position to stop your back and neck aching. Therefore, many people use tablets, as they are easier to position. You ma also want to consider wireless headphones. These will keep everyone happy as you won’t have to turn the TV volume up to hear it above the sound of the trainer.
Feel the wind in your face
Fans are essential because you don’t have the air flowing like you would on a real ride. Place a fan in front of you just to the left or right to maximise the air flow over your skin. If you can, put a fan behind you too. This will keep your back cool.

Pingback: Mountain Biking For Weight Loss - Get fit by mountain biking